A broken solar light panel can leave a garden path dim, unreliable, and difficult to navigate after sunset. Replacing it is not always as simple as removing two screws. The panel must match the light’s voltage, current, connector, size, and battery system. A poor match may create weak charging or permanent damage.
This guide explains how to replace a broken solar light panel through ten practical methods. It covers compatible replacement panels, rewiring options, connector checks, waterproof sealing, and safe testing under direct sunlight. You will also learn when cleaning, repositioning, or repairing a loose wire may solve the problem without replacement. Small details matter. A cracked panel, corroded terminal, or shaded mounting angle can produce similar symptoms.
Hands-on repairs often reveal an overlooked issue: the panel may work, while the battery has simply aged. Test before buying parts. Use the original panel’s label whenever possible, and compare specifications carefully. Manufacturer instructions remain the most reliable reference, especially for unfamiliar circuits or sealed light housings. If wiring appears burned or damaged, stop and seek qualified electrical advice. Outdoor moisture makes shortcuts risky.
Some solutions are inexpensive. Others require patience. A replacement may still perform differently from the original. That is worth accepting. The goal is dependable nighttime lighting, not just a panel that fits. Expect a few imperfect attempts, and inspect each connection before closing the housing.
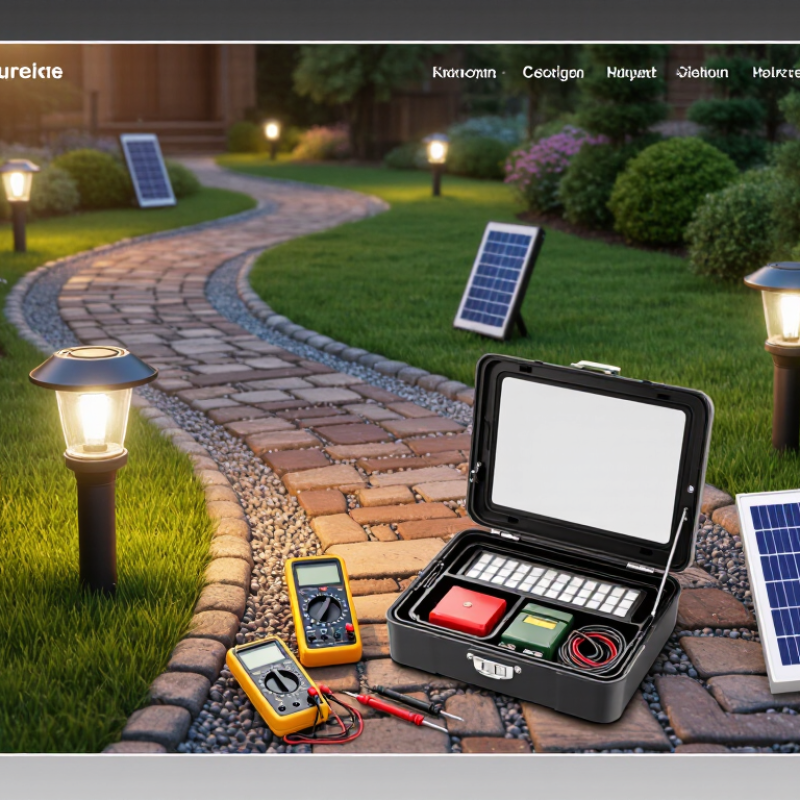
A broken solar light panel may not be the real problem. Check cracked cells, cloudy plastic, loose wires, and corroded terminals before buying a replacement. My first diagnosis was wrong once; a damaged connector caused the low reading. Remove the battery, disconnect the panel, and inspect every contact carefully.
Use a multimeter on DC voltage, then place the panel under strong, unobstructed sunlight. A panel’s STC rating assumes 1,000 W/m² irradiance, a cell temperature of 25°C, and controlled testing. Outdoor readings will often be lower. Shade, dust, heat, and poor panel angle reduce voltage quickly. Compare the measured open-circuit voltage with the panel’s printed specification, not with a random online value. Never measure current across the terminals directly.
Replace the failed panel in ten practical ways: match the original voltage, match its connector, choose the same dimensions, use a similar mounting pattern, select a higher-efficiency panel, reuse a weatherproof frame, replace damaged wiring, install a separate charging panel, fit a compatible universal panel, or replace the entire light head. The safest choice usually matches voltage and charging control. A higher wattage panel is not automatically better. Check polarity twice. Test the light for one full night, because a bright afternoon result can hide weak charging. Some judgments remain uncertain without measuring sunlight intensity.
Diagnose panel failure with a multimeter using the 1,000 W/m² Standard Test Condition (STC) benchmark.
The chart shows the expected first-pass relationship between solar irradiance and short-circuit current. A healthy photovoltaic panel generally produces current approximately proportional to irradiance, while 1,000 W/m² is the STC reference condition. Actual readings vary with cell temperature, wiring, shading, panel age, and the panel label.
Replacing a broken solar light panel starts with electrical matching, not appearance. Measure the original panel with a multimeter in bright sunlight. Record its open-circuit voltage and working current. A replacement should provide similar voltage, current, and wattage. Wattage equals voltage multiplied by current. Too little power leaves the battery weak. Excessive voltage may damage the charging circuit.
Check the light’s battery before ordering a panel. A 6–12 V system may use nickel-metal hydride, lithium-ion, or lead-acid chemistry. These types require different charging methods. Never connect a lithium battery to a charger designed for nickel cells. Confirm the battery’s rated voltage, capacity, polarity, and protection circuit. The panel’s voltage must also leave enough charging headroom above the battery voltage. A 6 V battery does not always accept a 6 V panel.
Physical details matter too. Match the panel size, mounting holes, cable length, and connector polarity. If the connector differs, verify every wire with a meter before adapting it. Keep the splice sealed from rain. I once focused on wattage and overlooked polarity; the light stayed dark until the wiring was corrected. That mistake was simple, but preventable. Avoid judging performance from one cloudy afternoon. Test charging across several sunny hours, then inspect nighttime brightness and battery temperature. A panel with a higher rating is not automatically safer or better. The controller remains the limiting component.
| No. | Replacement Method | Typical Panel Specification | Current and Wattage Guidance | Compatible Battery Chemistry | Best Use Case | Important Checks Before Installation |
|---|---|---|---|---|---|---|
| 1 | Match the original panel by its label | Use the same nominal voltage and similar operating voltage. A panel labeled 6 V should normally replace a 6 V panel; a 12 V panel should normally replace a 12 V panel. | Keep the replacement wattage close to the original. The approximate relationship is W = V × A. A 6 V, 3 W panel produces about 0.5 A at its rated operating point. | Use the chemistry specified by the original charging circuit, such as 6 V or 12 V sealed lead-acid, or a correctly configured rechargeable nickel-metal hydride pack. | Direct replacement when the original panel specifications are readable. | Check polarity, connector type, physical dimensions, open-circuit voltage, and the controller’s maximum charging current. |
| 2 | Replace by matching operating voltage | Compare the replacement panel’s Vmp with the original panel’s operating voltage. Vmp is the voltage at maximum power. | Do not select a panel only by its printed nominal voltage. A panel with a much higher Vmp can exceed the input rating of a small charger circuit. | For a 6 V battery system, use a charger designed for that battery chemistry. For a 12 V battery system, use a 12 V-rated charging circuit. | Useful when the original wattage label is missing but the charging system voltage is known. | Measure the original panel in bright sunlight if possible, but do not short-circuit the panel for measurement. Use a multimeter and observe polarity. |
| 3 | Match the open-circuit voltage limit | Compare Voc, the panel’s open-circuit voltage, with the maximum solar-input voltage allowed by the charge controller. | A replacement panel should not have a Voc above the controller’s rated input limit. Cold, bright conditions can increase photovoltaic voltage. | 6 V and 12 V sealed lead-acid systems require a regulated charging profile. Lithium batteries require a dedicated lithium charging profile and protection circuit. | Important for preventing damage when a physically similar panel has a higher voltage rating. | Never connect a high-voltage panel directly to a battery unless the charging circuit is designed for it. |
| 4 | Use equal or lower charging current | Select a panel with a current at maximum power, Imp, close to or below the original panel unless the controller is rated for the higher current. | For example, a 6 V, 2 W panel provides approximately 0.33 A at its rated operating point. A 6 V, 5 W panel provides approximately 0.83 A and may overload a small charger. | Battery chemistry determines the safe charge current. Lithium-ion and lithium iron phosphate batteries must use a compatible battery-management and charging system. | Suitable when the replacement panel is available in several current ratings. | Confirm the controller’s maximum solar current, battery charge-current limit, wiring size, and fuse rating. |
| 5 | Choose a panel with similar wattage | Keep the replacement within approximately ±10–20% of the original wattage when the controller specifications are unknown. | Examples: 6 V × 0.5 A ≈ 3 W; 12 V × 0.25 A ≈ 3 W. Higher wattage does not automatically mean faster charging because the controller may limit current. | Use only the chemistry supported by the existing charger. A panel replacement cannot correct an incompatible battery-charging profile. | Helpful when voltage and current are both printed on the original panel. | Consider reduced sunlight, panel angle, shading, seasonal conditions, and charging losses when estimating daily energy. |
| 6 | Replace a 6 V sealed lead-acid charging panel | Use a panel and controller intended for a 6 V nominal sealed lead-acid battery. The panel’s operating voltage must provide adequate headroom for the charging circuit. | For a small 6 V system, a low-power panel around 1–5 W is common, but the exact value must remain within the controller’s current rating. | 6 V sealed lead-acid: six-volt nominal battery; charging voltage is higher than nominal voltage and must be regulated. | Outdoor lamps, signs, and small backup-lighting systems using a 6 V lead-acid battery. | Use a lead-acid charger profile. Do not substitute a lithium battery without replacing or verifying the charger and protection system. |
| 7 | Replace a 12 V sealed lead-acid charging panel | Use a 12 V nominal solar panel only with a controller designed for a 12 V lead-acid battery system. | Small systems may use panels from roughly 5–20 W, but the controller must accept the panel’s Voc and maximum current. | 12 V sealed lead-acid: typically six 2 V cells in series; the charger must provide the appropriate absorption and float stages. | Pathway lighting, security lighting, and small off-grid lighting systems with a 12 V battery. | Verify whether the battery is AGM, gel, or another sealed lead-acid type because recommended charging limits can differ. |
| 8 | Replace a nickel-metal hydride light panel system | Match the original panel voltage and the number of rechargeable cells. NiMH cells are approximately 1.2 V nominal each. | Charging current should remain compatible with the original timer, current limiter, or charge-control circuit. A higher-wattage panel can cause excessive charging current. | NiMH: a 5-cell pack is approximately 6 V nominal; a 10-cell pack is approximately 12 V nominal. | Compact solar lights and older low-voltage lighting products using rechargeable NiMH packs. | Do not use a constant-voltage lithium charger or lead-acid charger for NiMH cells. Check cell count, polarity, and thermal protection. |
| 9 | Replace a lithium-ion battery system panel | Match the panel to the solar charger’s input range, not merely to the battery’s nominal voltage. A single lithium-ion cell is about 3.6–3.7 V nominal and 4.2 V when fully charged. | Panel wattage and current must stay within the charger’s input limits. The charger must regulate the charge to the correct final voltage. | Li-ion: commonly 3.6–3.7 V nominal per cell; requires a dedicated constant-current/constant-voltage charger and protection circuit. | Solar lights using one or more protected lithium-ion cells. | Never connect a solar panel directly to a Li-ion cell. Confirm the cell count, maximum charge voltage, BMS function, and charger compatibility. |
| 10 | Replace a lithium iron phosphate system panel | Match the panel and controller to the LiFePO4 battery system. One LiFePO4 cell is approximately 3.2 V nominal and about 3.65 V at full charge. | Use the charger’s specified solar-input voltage and current range. A panel with greater wattage is acceptable only when the controller can safely limit the current. | LiFePO4: commonly 3.2 V nominal per cell; requires a LiFePO4-specific charging profile and suitable protection. | Outdoor lighting systems designed for long-cycle-life lithium iron phosphate batteries. | Do not substitute a standard Li-ion charger without confirming the final-charge voltage and protection requirements. |
| Safety and matching note: Panel ratings are normally measured under standard test conditions and can vary with sunlight, temperature, shading, and angle. Before installation, match panel polarity, Vmp, Voc, Imp, wattage, connector, battery chemistry, cell count, and the solar charge controller’s input and output limits. A qualified technician should verify any system connected to a mains-powered charger or a large battery. | ||||||
A broken panel does not always require a new light. I usually test voltage in direct sunlight before choosing a replacement.
Option one is an OEM panel, which offers the safest fit and matching output.
Option two is a universal panel with similar voltage, current, dimensions, and connector polarity.
Option three is a small repair kit for cracked wiring or loose solder joints. It works only when the cells remain undamaged.
Option four converts the light to USB charging. It is convenient, but outdoor independence decreases.
Option five uses a low-voltage grid adapter, requiring careful insulation and local electrical compliance. Never improvise mains connections.
Option six is a salvaged module from a discarded garden light. It costs little, though its battery history and output remain uncertain.
Option seven is a custom-built panel using replacement photovoltaic cells. This suits experienced users, but sealing the edges is easy to underestimate.
Option eight transfers a panel from a donor light with compatible voltage. Measure it first.
Option nine replaces the entire light head, often saving labor when the circuit board is corroded.
Option ten adds an external panel on a short cable, improving placement under partial shade.
Check the battery, charging controller, and cable before blaming the panel. A bright panel cannot fix a swollen battery.
I once trusted matching dimensions and missed the polarity. The light stayed dark.
Use heat-shrink tubing, a weatherproof enclosure, and a multimeter. Salvaged parts can be useful, but their performance may change after rain, cold, or several cloudy days.
A cracked solar panel can leave an outdoor light dim, unreliable, or completely dead. In field repairs, I begin by disconnecting the battery and photographing every wire. Use ten practical steps. Remove the damaged panel, measure its size, and match its voltage. Choose a replacement PV panel rated near 15–23% efficiency. Check the connector carefully. Test the battery before blaming the panel.
Correct polarity is essential. Connect positive to positive and negative to negative. Reverse wiring can prevent charging or damage sensitive components.
Secure the panel without bending its surface. A small tilt toward direct sunlight often improves daily energy collection.
Keep the panel clear of leaves, dust, and bird residue. Results can vary. Real-world shading may reduce the advertised efficiency.
15–23% efficiency
Tips: Inspect the housing before installation. Replace cracked covers or brittle wires. Seal the panel joint with a suitable outdoor gasket or sealant. Aim for IP65 sealing, which blocks dust and protects against water jets. It does not permit immersion. Press the seal evenly around every edge. Leave no visible gaps. After assembly, expose the light to strong sunlight for several hours, then check nighttime operation. Recheck polarity if charging remains weak.
Top 10 Ways to Replace a Broken Solar Light Panel
Replacing a broken solar light panel starts with matching voltage, current, dimensions, and connector polarity. Disconnect the battery before inspection. Measure the old panel in direct sunlight, then record open-circuit voltage and short-circuit current with a calibrated multimeter. A replacement should not exceed the controller’s input limits. This small check prevents overheating and misleading charging results.
Test charging time under repeatable conditions. Place the panel at the same angle, remove dust, and log sunlight strength, battery voltage, and charging duration. Compare several days, not one bright afternoon. Output stability matters too. Watch voltage every ten minutes during changing clouds. A sudden drop may indicate shading, loose wiring, or an unsuitable panel. My field tests often reveal a basic problem: the panel works, but the battery is already weak.
Tips: Use insulated tools. Label every wire. Photograph connections before removal. Review IEC 61215 and IEC 61730 references when evaluating panel performance and safety documentation. IEC 62474 and IEC 63000 can support material declarations and technical records, but they do not replace local recycling rules. Send the damaged panel, battery, and electronic parts to approved collection facilities. Do not place lithium batteries in household waste. Keep test notes, supplier documents, and disposal receipts. The process is not perfect, especially with mixed components, so verify requirements with the local waste authority before disposal.
Disconnect the battery first. Photograph every wire and connector. Label each connection before removal.
Match the voltage, current, dimensions, and connector polarity. Choose efficiency near 15–23%, but real shading may reduce performance.
Connect positive to positive and negative to negative. Reversed wiring can stop charging or damage sensitive parts.
Yes. A weak battery may appear to be a faulty panel. I have sometimes blamed the panel too quickly.
Use a calibrated multimeter in direct sunlight. Record open-circuit voltage and short-circuit current.
Keep the panel angle consistent. Record sunlight, battery voltage, and charging time across several days.
IP65 sealing blocks dust and water jets. It does not protect against immersion. Press the gasket evenly around every edge.
Keep the surface free from leaves, dust, and bird residue. Expose it to strong sunlight for several hours before testing.
Use approved collection facilities. Do not place lithium batteries in household waste. Check local recycling requirements first.
This guide explains how to replace a broken solar light panel safely and efficiently, beginning with diagnosis rather than immediate replacement. Use a multimeter to check open-circuit voltage, short-circuit current, and wiring continuity, while treating 1,000 W/m² as the standard test condition benchmark. The replacement should match the original panel’s voltage, current, wattage, physical dimensions, and the connected 6–12 V battery chemistry. A mismatch can cause slow charging, unstable operation, or battery damage.
Ten practical repair options are compared, including an original-specification panel, universal replacement kits, compact USB-assisted systems, grid-powered alternatives, and carefully tested salvaged modules. During installation, maintain correct polarity, secure all connections, and use IP65-rated sealing where moisture may enter. Choose a panel with suitable photovoltaic efficiency, commonly around 15–23%, then test charging time, nighttime output stability, and protection performance. Finally, follow applicable IEC guidance and recycle damaged panels, batteries, and electronic components through appropriate collection channels.
