Why Learn How to Install Under Cabinet Lighting in Kitchen?

Time:2026-09-07 Author:Aria
0%

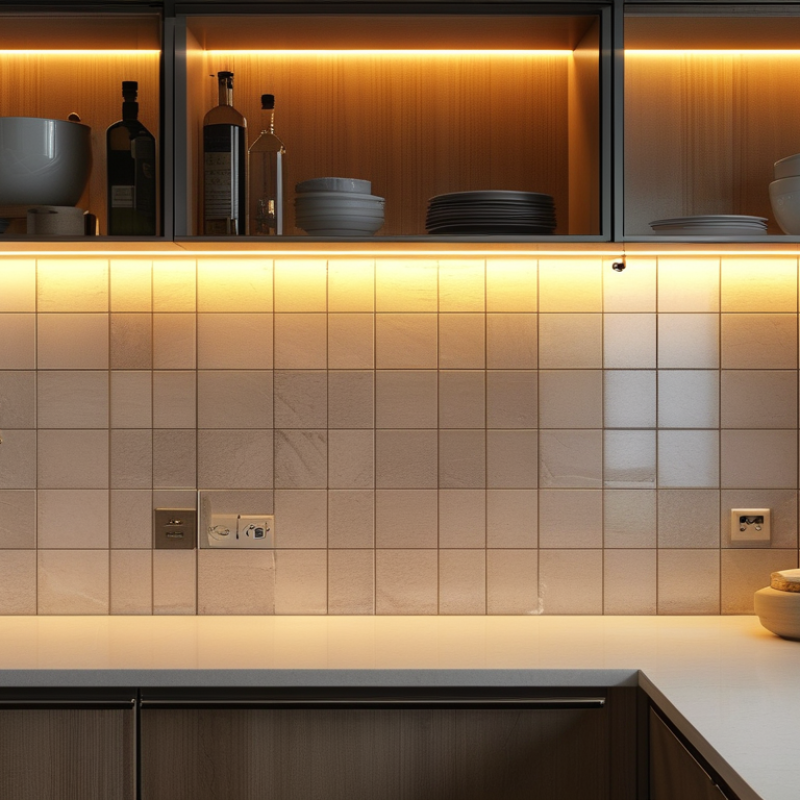
Learning how to install under cabinet lighting in kitchen can transform a dark countertop into a practical, welcoming workspace. A well-planned lighting system makes chopping vegetables safer and helps reduce eye strain during evening cooking. It can also highlight stone surfaces, tile backsplashes, and carefully chosen cabinet details.

The process involves more than attaching a light strip beneath a cabinet. You need to measure cabinet lengths, locate power sources, choose suitable color temperature, and hide cables neatly. Warm white LEDs around 2700K to 3000K often create a comfortable atmosphere. Neutral white lighting may provide clearer task visibility. Dimmers can offer better control when the kitchen serves different purposes throughout the day.

Safety matters throughout the installation. Follow the lighting manufacturer’s instructions and check local electrical requirements before connecting hardwired fixtures. A qualified electrician should handle new circuits or uncertain wiring. Low-voltage plug-in systems may be simpler, but exposed cables can still look untidy or become damaged. Use clips, channels, and strain relief where appropriate.

Small details matter.

From practical experience, uneven spacing can create distracting bright spots on the countertop. I have also seen adhesive strips loosen when cabinets contain grease or dust. Cleaning the surface first helps, but it does not guarantee a perfect result. This is where careful planning becomes valuable. The guide will explain useful tools, mounting methods, wiring choices, and common mistakes. It will also encourage realistic decisions, because the neatest installation is not always the easiest one.
Why Learn How to Install Under Cabinet Lighting in Kitchen?

Understand Task-Lighting Benefits: 300–500 Lux for Kitchen Worktops

Learning how to install under cabinet lighting can improve kitchen safety and daily comfort. Task lighting should illuminate the worktop, not merely brighten the room. A practical target is 300–500 lux across food preparation areas. Lux measures the light reaching a surface. This range helps you read recipes, see knife edges, and notice small spills. It can also reduce eye strain during longer cooking sessions.

I have found that placement matters as much as brightness. Install lights near the cabinet’s front edge, directing light toward the worktop. This position limits shadows from your body. Measure illumination at countertop level, especially near the sink, hob, and main preparation zone. Dark surfaces may need more careful testing because they absorb light. Local electrical rules may require a qualified electrician, particularly for fixed wiring. Always isolate the power before any installation work.

Avoid relying on appearance alone. A bright fixture can still create glare on polished stone or stainless steel. Choose a suitable color temperature and use diffused covers when possible. I once placed a light too far back, and the counter looked bright while the cutting area remained dim. That mistake was easy to miss at night. Recheck the worktop from a standing position, then test it during daytime and evening conditions. Some areas may measure 500 lux, while corners remain below 300 lux. Adjust spacing carefully, because perfect uniformity is difficult in real kitchens.

Choose LED Fixtures with 80–100 Lumens per Foot and CRI 90+

Why Learn How to Install Under Cabinet Lighting in Kitchen?

Under-cabinet lighting turns dark countertops into usable work surfaces. For most kitchens, choose LED fixtures producing 80–100 lumens per foot. This range gives clear task light without making a shallow cabinet feel harsh. The Illuminating Engineering Society commonly places kitchen task lighting near 300–500 lux, depending on the activity and surrounding light. Measure the counter after installation, rather than trusting packaging alone.

Color quality matters too. Select fixtures with a color rendering index of 90 or higher. The U.S. Department of Energy’s Solid-State Lighting reports emphasize color quality as a key factor in user satisfaction, not merely energy efficiency. A high CRI helps vegetables look natural and makes it easier to judge meat, sauces, and wood finishes. It is a small specification with visible results.

Install the light near the cabinet’s front edge, aimed toward the backsplash and work area. Clean the underside first; dust can weaken adhesive and shorten the fixture’s life. Keep wiring concealed, but leave access for maintenance. I would avoid placing one bright fixture only above the sink. Shadows may remain on the main preparation zone. Also, 100 lumens per foot can feel excessive in a white kitchen with glossy surfaces. That target is useful, not sacred. Test a short section at night before committing to the full run. Even careful plans sometimes need adjustment.

Plan 3000–4000K Color Temperature for Clear, Comfortable Work Areas

Learning how to install under-cabinet lighting starts with color temperature, not the fixture. For most kitchens, 3000–4000K creates a clear but comfortable work area. 3000K gives wood surfaces a warmer appearance. 4000K reveals cutting lines and ingredient colors more neutrally. Very cool light can feel harsh before breakfast. It is easy to overlight a small counter.

Before drilling, measure each cabinet run and mark the task zone above the counter. Place the light toward the front edge, not deep against the wall. This reduces shadows from your hands and upper cabinets. I once mounted a strip too far back. The backsplash looked bright, but the cutting board stayed dim. That mistake changed my layout habits.

Check the fixture’s color-rendering performance, dimming method, and heat clearance. A high color-rendering rating helps vegetables, meat, and labels look more accurate. Keep wiring protected, and disconnect power before any connection. If circuit work feels unfamiliar, use a qualified electrician. Test the light at night and in daylight. Your kitchen may need 3500K, not a fixed rule. Small imperfections matter. A visible hotspot or glare can make careful cooking tiring.

Why Learn How to Install Under Cabinet Lighting in Kitchen?

Plan a 3000–4000K color temperature for clear, comfortable work areas. Use task lighting to provide approximately 500 lux on food-preparation surfaces, while general kitchen circulation areas typically need about 200 lux.

Under-cabinet fixtures help reduce shadows from wall cabinets and improve visibility at the countertop. The values shown are typical target illuminance levels used for kitchen task and general areas; actual results depend on fixture output, spacing, mounting height, surface reflectance, and room layout.

Install Wiring, Drivers, and Controls According to NEC Safety Practices

Why Learn How to Install Under Cabinet Lighting in Kitchen?

Installing under-cabinet lighting is more than attaching slim fixtures beneath cupboards. The wiring, driver, and control system must follow National Electrical Code safety practices. In field work, the safest approach begins with switching off the circuit and verifying the conductors with a tester. A neat appearance does not prove a safe installation.

Use cable, connectors, junction boxes, and drivers listed for the intended location. Follow the manufacturer’s instructions under NEC 110.3(B). Keep splices inside accessible boxes, never buried behind finished cabinets or walls. Protect cables from sharp metal edges and cabinet screws. Low-voltage wiring still needs careful routing. It is not automatically harmless. The driver also needs ventilation and a serviceable location. Heat can shorten its life.

Kitchen circuits may require GFCI or AFCI protection, depending on the circuit and local NEC adoption. Confirm the current rules with the authority having jurisdiction or a qualified electrician. A lighting control must match the driver and load, especially when dimming. Electronic controls can flicker when compatibility is ignored. I have seen installations fail because the switch looked suitable but lacked the correct load rating. Small details matter. Ground metal parts properly, secure every connection, and label the circuit when practical. My own preference is to test each fixture before closing the backsplash, because correcting hidden wiring later is unnecessarily difficult.

Test Light Uniformity, Glare, and Energy Use Before Finalizing Installation

Learning how to install under cabinet lighting becomes valuable when testing happens before permanent fitting. A kitchen may look bright, yet the work surface can remain uneven. IES guidance commonly places kitchen task lighting near 300–500 lux, depending on the activity. Measure the countertop with a light meter at several points. Record readings near the wall, sink, and cutting area.

Check uniformity, not just maximum brightness. Divide the lowest reading by the highest reading. A result closer to 1.0 usually feels more consistent. Dark gaps between fixtures often appear beside cabinet frames. Move the light source forward by a few centimeters and measure again. Small changes matter. My first layout looked attractive, but the chopping area still had shadows.

Glare requires a practical test. Stand at normal working height and view the surface from different angles. Exposed light sources can create harsh reflections on polished stone and stainless steel. The Illuminating Engineering Society recommends evaluating visual comfort alongside illuminance, rather than relying on brightness alone. Energy use also deserves measurement. The U.S. Department of Energy reports that LED lighting can use at least 75% less energy and last up to 25 times longer than incandescent lighting. Check the installed wattage and estimate daily operating hours. A dimmer setting may reduce consumption, but it can also reveal flicker or uneven dimming. Test it before drilling final holes.

FAQS

: What brightness level is suitable for under-cabinet kitchen lighting?

: Aim for 300–500 lux across food preparation areas. Brightness can deceive. Measure the worktop directly.

How many lumens should LED fixtures produce?

Choose about 80–100 lumens per foot for most kitchen worktops. Test a short section first.

Where should under-cabinet lights be positioned?

Place them near the cabinet’s front edge. Aim light toward the backsplash and work surface.

Why does placement affect kitchen safety?

Correct placement reduces shadows from your body. It helps reveal knife edges, spills, and small food scraps.

How can I check whether the lighting is even?

Measure several points with a light meter. Check near the wall, sink, cutting area, and corners.

What should I do if some areas remain dark?

Move the fixture forward a few centimeters. Adjust spacing between fixtures when cabinet frames create shadows.

How can I reduce glare on polished surfaces?

Use diffused covers and inspect the counter from standing height. Check reflections on stone, metal, and glossy surfaces.

Is a high color-rendering index important?

Yes. A CRI of 90 or higher helps vegetables, sauces, meat, and wood appear more natural.

How should I test energy use and dimming?

Check total wattage and estimate daily operating hours. Test dimming for flicker or uneven brightness.

What safety step matters before fixed wiring work?

Isolate the power before installation. Follow local electrical rules and use a qualified electrician when required.

Conclusion

Learning how to install under cabinet lighting in kitchen can greatly improve both comfort and functionality. Proper task lighting should provide approximately 300–500 lux on kitchen worktops, helping reduce shadows while preparing food. LED fixtures with about 80–100 lumens per foot and a CRI of 90 or higher can produce bright, natural-looking illumination that makes ingredients and surfaces easier to see. A color temperature between 3000K and 4000K offers a clear yet comfortable working environment without appearing too harsh.

Before installation, carefully plan the fixture locations, wiring, drivers, and control placement. All electrical work should follow NEC safety practices and applicable local requirements, with power disconnected during installation. Once the system is connected, test the lighting across the entire countertop. Check for even coverage, glare, shadows, and unnecessary energy use, then adjust the fixture position or controls as needed. Careful planning and final testing help create a safe, efficient, and pleasant kitchen lighting system.

Aria

Aria

Aria is a dedicated marketing professional with a deep passion for innovative strategies and a keen understanding of our company's product offerings. With a wealth of experience in the industry, Aria excels at crafting engaging content that highlights the unique features and benefits of our......